
Poultry shears engineered for chicken--like Misen's 10.7-inch, micro-serrated, spring-loaded model--turn a slippery, wasteful chore into a fast, precise operation, gripping bones instead of skating off them, powering through joints in one clean motion, and cutting waste by keeping meat on the portions you want. The article walks readers through the science that matters--thick, high-carbon stainless blades, pressure-distributing nonslip handles, separable pivots for sanitation, and balanced spring tension--then shows exactly how to break a whole bird into ten tidy pieces in minutes, harvest herbs, slice pizza, or prep vegetables with the same tool. It stresses that proper maintenance--hand-wash, sanitize, dry, oil the pivot, and store safely--keeps the shears sharp and rust-free, eliminating the hidden food-safety risks and extra force that dull, one-size-fits-all scissors demand. Ultimately, readers learn that investing in purpose-built poultry shears and a simple care routine replaces multiple gadgets, saves money on wasted meat, and makes everyday kitchen prep faster, safer, and far more enjoyable.
Best Poultry Shears: Why Quality Makes a Difference
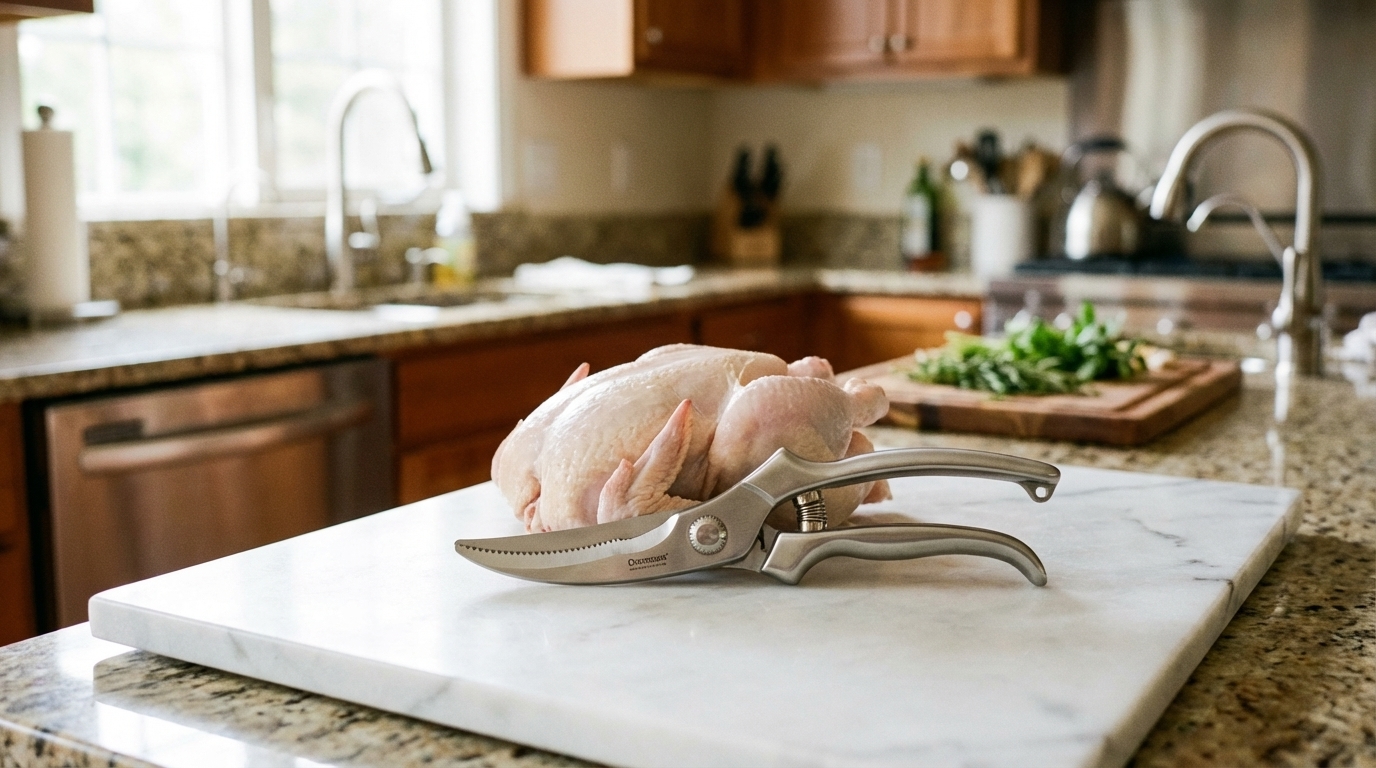
Engineered to grip wet bone and slice cleanly along joints, quality poultry shears turn a slippery, waste-heavy chicken breakdown into a fast, precise cut that keeps more meat on the portions and seconds on the clock.
How durable tools speed up prep and reduce waste
Regular kitchen scissors and raw chicken are a bad match--blades slip off wet bone, skin gets mashed instead of cut, and you end up reaching for a knife to finish the job anyway.
Poultry shears are built around those exact failure points: serrated blades grip slippery bone surfaces rather than skating across them, spring-loaded handles stay open between cuts so you maintain your grip without readjusting, and a bone-holding notch concentrates leverage right where you need it to push through a joint cleanly. [1] That engineering difference shows up immediately at the cutting board--spatchcocking a chicken or separating leg quarters takes seconds rather than minutes, with cuts that follow the joint line instead of tearing through surrounding meat. [2] Cleaner separation also means less waste: when shears slice along a joint precisely, meat stays on the portion you want rather than pulling apart at the seam or clinging to discarded backbone.
Blades that slip or mash leave ragged edges, uneven portions, and more trim loss than a tool designed for the task would ever produce. [3]
Misen's approach to everyday reliability
Misen's kitchen shears are built around a straightforward premise: the tool should hold up across the full range of daily tasks without demanding much from you in return.
The blades are German stainless steel with micro-serrations, strong enough to spatchcock chicken or push through meat and bone without slipping. [4] At 10.7 inches, they have the longest blade of any shears tested by Food & Wine, which translates to longer, more even cuts with fewer repositioning strokes. [5] The handle uses the same gray plastic found across Misen's utensil line--dense enough to absorb pressure during demanding cuts, with a nonslip inner lining that keeps your grip secure on wet tasks like raw poultry. [5] The blades separate for cleaning, which matters most when you're moving between raw meat and anything else at the cutting board. [4] One trade-off worth knowing: the steel can rust if you store the shears damp after reassembling, so drying them before putting them back together is non-negotiable. [5]
Features to Look for in the Best Poultry Shears
Choose poultry shears with thick high-carbon stainless blades, ergonomic nonslip handles, separable design, smartly placed lock, and balanced spring so you cut through bone cleanly in one squeeze instead of hacking, slipping, or hiding bacteria.
Blade design, serration, and bone‑cutting power
Here's what most people miss: blade thickness. Thin blades flex and slip off bone, wasting your effort.
Thick blades transfer your grip strength directly into the cut--no deflection, no repeated attempts. [6] The steel matters too. High-carbon stainless maintains its edge through repeated bone contact, while standard steel dulls quickly and forces you to squeeze harder with each use. [7] Get the blade design right, and you'll slice through joints in one clean motion instead of sawing back and forth. [6]
Ergonomic grip, spring tension, and easy cleaning
When you're pushing through breastbone with both hands, handle design shows its worth. Sharp edges and hard plastic dig into your palms with every squeeze. Good handles distribute that pressure across your entire grip--padding helps, but the shape matters more. [8] Raw chicken makes everything slippery, so nonslip coating isn't optional.
Without it, you'll stop mid-cut to readjust your grip instead of powering through the joint. [8] Spring tension needs to hit a sweet spot: enough to open the blades between cuts without forcing smaller hands to fight the spread. Too much spring action defeats the purpose--you'll work harder closing the shears than cutting with them. [8] Watch where the lock sits too. Locks near the pivot or upper handle get in the way during use.
The best position? Bottom of the handle, where it stays clear but still keeps blades safely closed in storage. [8] For cleaning after raw poultry, separable blades make the difference between truly clean and "clean enough." As discussed in Misen's approach above, that pivot point where blades cross traps contamination that water alone can't reach. Fixed blades force you to work around angles that hide bacteria--a genuine food safety concern that proper take-apart design eliminates. [8] Like the
Getting the Most Out of Your Misen Poultry Shears
Master the 10-piece chicken breakdown and everyday herb snips with one tool: Misen's spring-loaded shears turn whole-bird butchery into minutes of clean cuts and zero waste.
Step‑by‑step chicken breakdown workflow
Breaking down a whole chicken becomes straightforward once you know where to cut. With your Misen kitchen shears in hand, you'll work through a simple sequence that turns one bird into ten perfectly portioned pieces. Start with the chicken breast-side down. For the wings: pull each tip away from the body, feel for the joint, and cut straight through.
Pull the wing toward you to expose the drumette joint--a quick pop and cut separates it cleanly. [9] Flip to breast-side up for the legs. Cut the skin between leg and breast, making a small arc around the oyster (that tender bit you don't want to leave behind). Bend the leg parallel to the spine and pull up--the hip joint will pop free, making it easy to cut through. [9] For thigh and drumstick separation, turn the leg skin-side down, wiggle to find where they connect, and slice through the joint. [9] Now for the backbone removal--this is where those spring-loaded handles really help. Stand the chicken upright and cut down both sides of the backbone, using steady pressure rather than forcing it.
Save that backbone with your wing tips for stock. [10] Last step: place the breast skin-side down and run your shears down the center to separate the halves. Your result: two drumettes, two flats, two thighs, two drumsticks, two breast halves, plus bones for stock. Clean portions, minimal waste, and it takes just minutes once you get the rhythm. [9]
Versatile uses: herbs, veggies, and bread
Once the chicken work is done, these shears earn their keep in everyday prep. The same blades that power through bone make quick work of kitchen herbs--snip chives directly over your finished dish, cut green onions at any angle, or chop lettuce into perfect bite-sized pieces right into the bowl. Need to harvest herbs or trim vegetables?
The shears handle those tasks faster than reaching for a knife. [5] That long blade design pays off beyond poultry too. Pizza night becomes simpler when you can slice through crust and toppings in one clean stroke instead of sawing with a wheel cutter. Trimming bacon strips to size, portioning flatbreads, even cutting parchment paper--the uses multiply once you start reaching for shears instead of other tools. [5] As chef Michelle Wallace notes, quality shears handle meat, bone, seafood, herbs, and vegetables without needing multiple specialized tools.
The key is keeping them clean between tasks--especially after raw protein work. A quick wash ensures your versatile shears stay ready for whatever prep comes next. [5]
Maintaining Your Best Poultry Shears for Long‑Term Use
Keep your poultry shears safe and razor-sharp by fully separating the blades, scrubbing and sanitizing them after every use, oiling the pivot, and storing them protected--then hone only when cuts turn ragged to maintain effortless, injury-free precision.
Cleaning, sanitizing, and rust‑free care
As covered earlier, separable blades are essential for thorough cleaning after raw poultry work. Your post-use routine should follow this sequence: separate the blades at the pivot, wash each piece with warm soapy water and a soft cloth, focusing on the pivot area and blade edges where meat juice collects. [11] Rinse thoroughly and dry immediately--don't leave the shears submerged or soaking.
Stainless steel resists rust, but water left on the blades still causes oxidation that weakens the metal. [12] After washing, sanitize by submerging the separated blades in diluted bleach solution--two teaspoons per gallon of water--for two minutes, then dry completely before reassembling. [11] This sanitizing step matters: soap removes visible residue, but only sanitizing eliminates bacteria that survive washing. [13] Once dry, apply a drop of food-grade mineral oil to the pivot joint. Skip cooking oils--they turn rancid and attract debris. [11]
Proper storage and blade upkeep
Store your shears intentionally--a knife block, magnetic strip, or protective drawer insert keeps blades separated from other tools and prevents edge-first falls when reaching into drawers. [14] Skip the sharpening schedule--let performance guide you.
When cuts require extra force or leave ragged edges, it's time. [14] This matters for safety: dull blades slip more easily and require sustained force that leads to repetitive strain injuries over time. [15] Sharp blades cut cleanly with less pressure--better portions, less waste, lower injury risk.
Your [15]
- Serrated, spring-loaded poultry shears grip bone and cut joints cleanly, reducing waste.
- Choose thick, high-carbon stainless blades that transfer force without flexing or dulling.
- Handles need nonslip coating and pressure-distributing shape to stay secure on wet poultry.
- Separate blades at the pivot for full sanitizing after raw meat to eliminate trapped bacteria.
- Dry blades completely before reassembly to prevent rust on stainless steel.
- Apply food-grade mineral oil to the pivot after cleaning; avoid cooking oils that turn rancid.
- Sharpen shears only when cuts need extra force or leave ragged edges to maintain safety.
- https://butcherbbq.com/blogs/news/poultry-shears-complete-guide-choosing-best-tool-859-98?srsltid=AfmBOoqQ0s4pZeILwU7h-aIjgQN5hyw6rzDFywEd5CsVhmc8sSQmTcv0
- https://www.seriouseats.com/the-best-poultry-shears-kitchen-equipment-review
- https://www.ignitedcutlery.com/blogs/news/what-is-poultry-shears-and-what-are-they-used-for?srsltid=AfmBOoqRYE84QkctTf-ybcY5HidS2sWKfQTJ1TC4TYTL_FxBEhrqck-b
- https://www.amazon.com/Misen-Heavy-Duty-Kitchen-Shears/dp/B0DZPDTYGR
- https://www.foodandwine.com/best-kitchen-shears-7096434
- https://www.axionblog.42web.io/what-are-the-best-poultry-shears/
- https://wolffindustries.com/blogs/technical-blog/poultry-processing-shears-vs-poultry-knives?srsltid=AfmBOopEIYejmE7EQMnWLcxYvUydcpTAzqSsotULYh8EZj3QcpookmCU
- https://www.reviewed.com/cooking/best-right-now/best-poultry-shears
- https://www.tasteofhome.com/article/how-to-cut-up-a-whole-chicken/
- https://www.fiskars.com/en-us/cooking/ideas-and-how-tos/cooking-techniques/deconstructing-a-chicken-using-butcher-shears
- https://www.ignitedcutlery.com/blogs/news/how-to-clean-and-maintain-your-kitchen-shears?srsltid=AfmBOoqSy3-WDDf08PwCfZUKHqvuVqoOWAjWEbrahQbFzF-xCNAOMCWC
- https://girlcooksworld.com/how-to-properly-care-for-kitchen-shears/
- https://emaidsinc.com/blog/cleaning-up-after-raw-meat-a-guide-to-proper-sanitization/
- https://www.ignitedcutlery.com/blogs/news/how-to-clean-and-maintain-your-kitchen-shears?srsltid=AfmBOoo4OF4kMsCLv3hoKz0oObhnrpL_PsUz5RRihPa6rt6D7he_Samo
- https://wolffindustries.com/blogs/technical-blog/how-to-sharpen-poultry-processing-shears?srsltid=AfmBOopfQ-dzh6tTBcvSzAbIX2nXt5qJOdBrhce9QEdUCcZIwPmEdj-L