

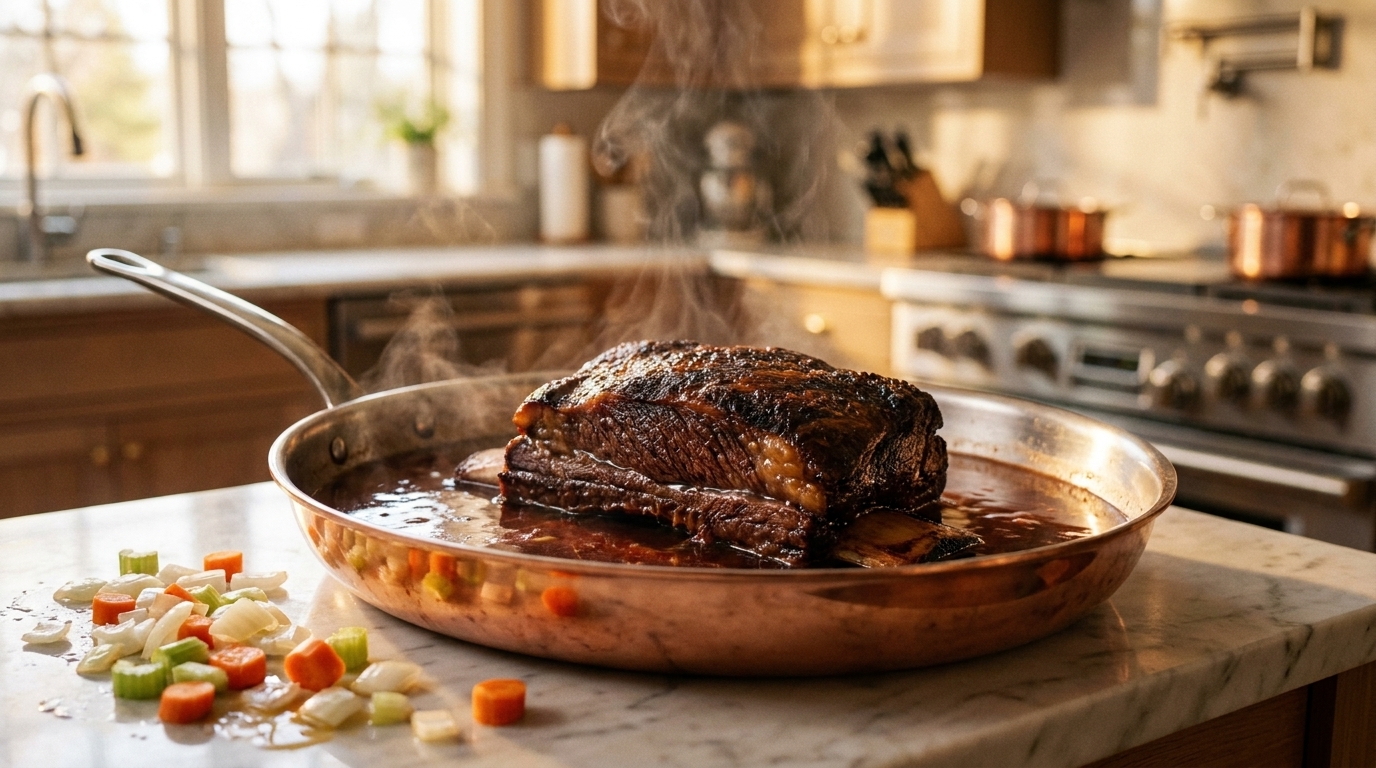
Master shallow braising in a rondeau by searing beef in batches, then simmering gently in liquid that reaches halfway up the meat for tender, flavorful results. The rondeau's wide, flat base and straight sides create the ideal geometry for building depth through browning while concentrating sauce naturally as it cooks.
What Does It Mean to Braise Beef and Why a Rondeau Is the Ideal Vessel
A rondeau's wide, flat base and shallow sides create the ideal searing surface and moisture control for braising beef to tender perfection.
The braising method: low-and-slow cooking that transforms tough cuts into tender, flavorful results
Braising combines searing -- which builds flavor through the Maillard reaction -- with slow, low-temperature cooking in liquid, and it's this two-stage approach that explains how do you braise beef for genuinely tender results.
The cuts that benefit most, like chuck, brisket, and short ribs, come from heavily worked muscles packed with collagen, the connective tissue that makes them tough and chewy in their raw state. [2] When cooked slowly in moisture at 160-180 degreesF over two to four hours, that collagen converts into gelatin -- enriching both the meat's texture and the surrounding braising liquid with a silky, full body. [1] Maintaining a consistent simmer around 180-190 degreesF is what controls the outcome: too high and muscle fibers contract and expel moisture; too low and the collagen conversion stalls before the meat ever tenderizes. [3]
Why shallow braising in a rondeau outperforms other cookware for even heat distribution and moisture control
The rondeau's wide, flat base gives it a larger searing surface than a Dutch oven or stockpot, which matters because browning the meat before adding liquid is what builds depth in a braise. [5] Its straight sides sit at a height that keeps braising liquid at roughly halfway up the meat without trapping excess steam, so liquid concentrates naturally as it cooks rather than pooling and diluting. [4] A Dutch oven's deeper walls tend to submerge cuts and trap more moisture than a shallow braise requires, while a stockpot's narrow base makes effective searing nearly impossible. [6] To see the full range of this pan's applications, what to cook in a rondeau covers eight uses where its geometry pays off.
Selecting Your Beef Cut and Preparing for Shallow Braising Success
Dry-brining your beef and searing it in batches ensures a golden crust and deep flavor that makes tough cuts forgiving to cook.
Budget-friendly beef cuts ideal for braising: chuck, brisket, short ribs, and how to trim and portion them
Chuck, brisket, and short ribs cost less than leaner cuts because they come from muscles with the most connective tissue -- collagen that converts into gelatin during braising and gives the meat its tender texture. [7] Short ribs are sold bone-in, cut from the brisket, chuck, plate, or ribs, or boneless -- boneless versions come specifically from the chuck and portion more uniformly into similar-sized pieces. [9] Bone-in ribs hold their shape better through a full braise, while boneless cooks faster; when breaking down a chuck roast into portions, a sharp chef's knife makes cleaner cuts through fat and dense muscle fibers. [9] The high fat content across all three cuts is actually what makes them forgiving to cook -- short ribs in particular are nearly impossible to overcook. [8]
Seasoning and searing: building flavor foundation before liquid meets meat in your rondeau
Before any heat is applied, two steps determine sear quality: drying the meat's surface and salting it at the right time.
Patting the beef dry with paper towels removes surface moisture that causes steaming instead of browning. [11] Dry brining -- seasoning generously with salt and refrigerating the beef uncovered for at least an hour before cooking -- allows salt to penetrate and reabsorb, seasoning below the surface in ways a surface-only application cannot. [10] Once the rondeau's oil shimmers, add the beef in batches; overcrowding drops the pan temperature and causes the meat to steam rather than sear, preventing both the Maillard reaction and the fond that develops on the pan floor. [12]
The Complete Shallow Braising Process: From Sear to Finish in 6 Steps
Deglazing the pan with wine or stock dissolves the flavorful fond into your aromatics, then gentle oven heat transforms tough meat into fork-tender results over two to three hours.
Steps 1-3: Searing the beef, building aromatics, and deglazing to capture fond and depth
After the last batch of beef comes out of the rondeau, the pan floor will be covered in fond -- browned bits that carry concentrated flavor from the sear. [13] Add mirepoix (onion, carrot, and celery) to the fat remaining in the pan, season lightly with salt, and cook until softened; the moisture they release begins dissolving fond into the aromatics before any liquid is added. [10] Deglaze with red wine, stock, or a combination, then scrape the pan bottom with a wooden spoon until all the fond dissolves into the liquid -- this step is where much of the braise's depth comes from. [13] If using wine or brandy, reduce briefly first to cook off raw alcohol before adding more liquid. [10]
Steps 4-6: Adding braising liquid, managing temperature and time, and finishing the sauce for restaurant-quality results
After returning the seared beef to the rondeau, add braising liquid to reach halfway up the meat -- not to submerge it -- then bring to a simmer, cover, and transfer to a 325 degreesF oven or hold stovetop heat around 180 degreesF. [15] Spoon the liquid over the meat every hour to keep exposed surfaces moist, and add more stock if the liquid drops below one-third height. [16] The long cook -- two to three hours for chuck or short ribs -- does most of the sauce work naturally, so once the beef is fork-tender, remove it and reduce the braising liquid over medium heat until it coats a spoon. [14] Skimming fat while it reduces clarifies the sauce without a starch thickener, yielding a clean, concentrated finish. [15]
Braising Liquid Options and Timing Guidelines for Perfectly Tender Beef
Stock and wine together create a richer braising liquid than either alone, while the fork test--not the clock--tells you when beef is truly tender.
What is the best liquid for braising beef: stock, wine, and combination ratios that work every time
Braising liquid has three roles: it imparts moisture, aids tenderization, and infuses flavor into both the meat and sauce. [18] For beef, a stock-and-wine combination outperforms either alone -- stock contributes body while wine adds acidity that keeps the sauce from tasting flat. [17] Full-bodied reds like Cabernet Sauvignon, Syrah, or Zinfandel suit darker cuts like short ribs and chuck; use a wine you'd actually drink, since cooking concentrates existing flavors rather than correcting bad ones. [18] A reliable starting ratio is 2 parts liquid per 10 parts meat -- roughly 1 quart of combined stock and wine per 10 pounds of beef. [17]
Braising time and temperature chart: how long to braise beef based on cut size and your preferred doneness level
| Cut | Portion size | Temperature | Approximate time |
|---|---|---|---|
| Short ribs (English-cut) | 4-inch bone-in pieces | 300 degreesF oven / 190 degreesF stovetop | 2-3 hours |
| Short ribs (flanken-cut) | 2-inch thick slabs | 300 degreesF oven / 190 degreesF stovetop | 2-3 hours |
| Chuck roast | 3-4 lb portions | 300-325 degreesF oven / 190 degreesF stovetop | 3-3.5 hours |
| Brisket | 3-5 lb flat | 300-325 degreesF oven / 190 degreesF stovetop | 3.5-4 hours |
Temperature targets matter, but the fork test is the only reliable doneness indicator -- a fork should slide into the thickest part and out again with no resistance, and if it tugs at all, the meat isn't done. [10] Short ribs braised at 300 degreesF typically reach this point in 2 to 3 hours, whether you're working with 4-inch English-cut pieces or 2-inch flanken slabs. [19] Larger, denser cuts like chuck and brisket need an additional 30 to 60 minutes because their muscle structure requires more time for full collagen conversion -- pull them the moment a fork meets no resistance rather than watching the clock. [10] For stovetop braising, hold a bare simmer at roughly 190 degreesF and avoid letting the liquid reach a rolling boil, which tightens muscle fibers instead of relaxing them. [10]
- Braising converts collagen to gelatin at 160-180 degreesF over 2-4 hours, transforming tough cuts into tender meat.
- A rondeau's wide, flat base provides superior searing surface and prevents liquid from submerging or trapping excess steam.
- Dry brine beef for at least an hour before searing to season below the surface and ensure proper browning.
- Sear meat in batches to maintain pan temperature; overcrowding causes steaming instead of the Maillard reaction.
- Keep braising liquid at halfway up the meat, not submerged; reduce sauce after cooking until it coats a spoon.
- Use a fork test for doneness--the fork should slide through the thickest part with no resistance.
- Combine stock and wine at a 2:1 ratio per 10 pounds of beef; full-bodied reds work best for dark cuts.
- https://www.chefapprovedtools.com/blog/what-is-braising
- https://annex.exploratorium.edu/cooking/icooks/2-1-03article.html
- https://www.americastestkitchen.com/articles/552-how-to-braise-brisket
- https://www.tigerchef.com/blog/cookware-all-about-different-types-of-commercial-cookware/2065?srsltid=AfmBOoooooIpYUDUR2I2HGo_CxW1p12uvTjLTnp8irLlX8ztMqhSf8Aw
- https://www.seriouseats.com/gift-guide-essential-pots-and-pans-presents-for-home-cooks
- https://www.chefstop.ca/blogs/guides/brazier-vs-rondeau-vs-stock-pot-choosing-the-right-pan-for-your-kitchen?srsltid=AfmBOoopQ47mljj7s8MpeHm1q3LkkoOImOYxZ-ri2L33RaTnBcW1kCnT
- https://www.debuyer-usa.com/blogs/how-to/how-to-braise-meat-step-by-step-guide?srsltid=AfmBOop1pqf2pmjMEUUqXNtSwcV628SzIXUl9eiV4lnqfpaaxcatqQpp
- https://edibletimes.com/braised-short-ribs-with-polenta/
- https://www.fromachefskitchen.com/mississippi-style-boneless-short-ribs/
- https://virginiawillis.com/braising-basics-five-steps-to-perfectly-braised-meats/
- https://meangreenchef.com/how-to-sear-meat/
- https://www.knorr.com/uk/tips-and-tricks/brown-meat-before-braising.html
- https://stephenlarosa.co/braising-meat-perfectly-in-10-simple-steps/
- https://www.dartagnan.com/braising-basics-and-techniques.html?srsltid=AfmBOooJm5mfKds29Im1ejshVdCdORdt2AAu0e6jUTYiS7Rf_qikCDlK
- https://www.kitchenkapers.com/pages/terms?srsltid=AfmBOorIXtImJH5MnH04TZPc9ejbflnE-XqVQBiTATUX8ehQhPggSaFg
- https://playswellwithbutter.com/beef-osso-buco/
- https://www.theculinarypro.com/braises-stews
- https://www.foodandwine.com/red-wine-braised-short-ribs-11862451
- https://www.seriouseats.com/red-wine-braised-beef-short-ribs-recipe